
The New Class wizard is divided into the following steps:
1. Describe the name and location for the new class.
2. Specify base classes and methods for the new class.
3. List #include files for the new class.
4. Assign the new class to the project's build targets.
To use the New Class wizard, follow these steps:
1. Describe the name and location for the new class.
This section of the wizard, shown in Figure 7.11, lets you specify the name, declaration, and location for the new class. Other options are available to further describe the class.
This section includes the following parts:
Enter a name for the class in this field.
This pop-up menu lets you specify the type of declaration file:
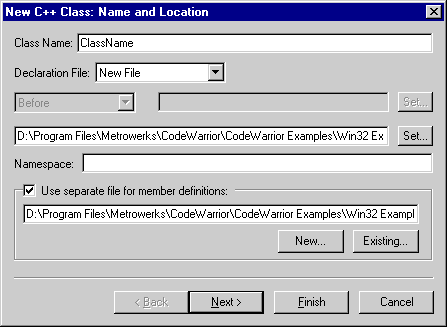
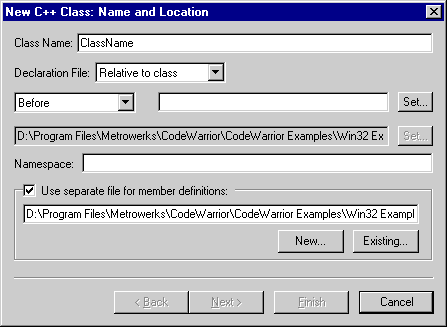
If you choose the Relative to class option, the pop-up menu and the class field beside it become enabled, as shown in Figure 7.12. In the class field, type the name of the class you want to relate to the new class. Alternatively, click Set next to the class field, select a class in the window that opens, and then click Select. Next, use the pop-up menu to place the new class Before or After the class in the class field.
In this field, type a namespace for the new class. Each name in the namespace should be unique.
2. Specify base classes and methods for the new class.
This section of the wizard, shown in Figure 7.13, lets you define base class, methods, and additional information for the new class.
This section includes the following parts:
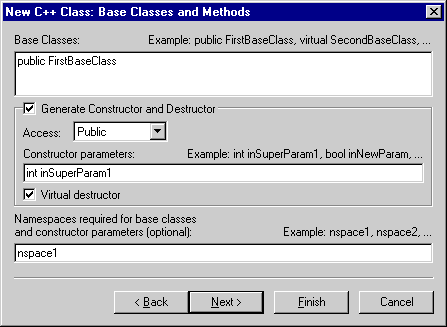
If you wish, you can enter in this field required namespaces for the base classes from the Base Classes field and the constructor parameters in the Generate Constructor and Destructor part of the wizard.
3. List #include files for the new class.
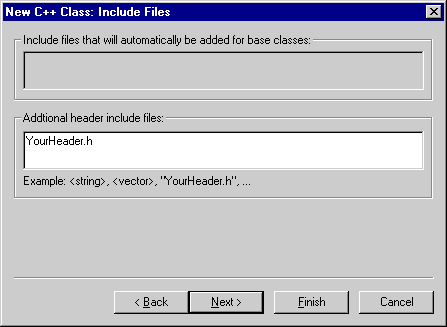
This section of the wizard, shown in Figure 7.14, lets you specify additional header #include files for the new class.
This section includes the following parts:
This field shows you a list of #include files that will be automatically added to the base classes.
4. Assign the new class to the project's build targets.
This section of the wizard, shown in Figure 7.15, lets you assign the new class to particular build targets within the active project.
This section includes the following parts:
This field shows you the path to the project whose build targets are listed in the next field.
New Class wizard - Targets: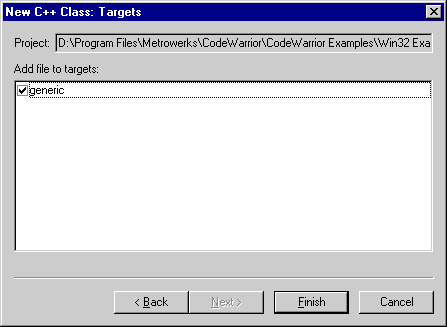
To assign the class to a specific build target, enable the checkbox next to the build target's name in this list. For example, in Figure 7.15, the new class is assigned to the generic build target.