You can run a batch file after building an application in the
CodeWarrior® IDE. However, a default file mapping for batch files
does not exist. Whether you saved your file with the extension
".bat" or another extension, the IDE will not allow it to be added
to the project.
1. Display the Target Settings window.
Choose Edit > Target Settings, where Target is the name of the currently selected target for the project.
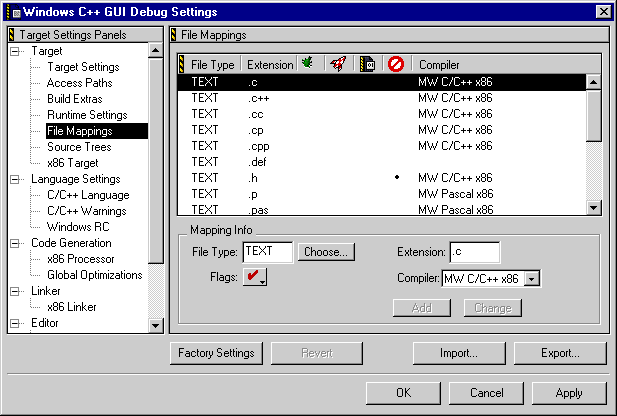
Select File Mappings from the Target Settings Panels area. The File Mappings panel appears, as shown in Figure 14.1. Enter the file extension for your batch file in the Extension field and select None from the Compiler list-box. Click Add to add the extension to the list of recognized file types. Repeat this process for each batch file type to be recognized by the IDE. When you are finished, click OK to save the new settings and close the window.
3. Add the batch files to the project.
Choose Project > Add Files. The Select files to add dialog appears, as shown in Figure 14.2. Navigate to your batch files, select them (use Control-click to select multiple files), then click Add. The Add Files dialog appears, as shown in Figure 14.3. Add the files to the preferred targets by enabling the options in the Targets area, then click OK.
Select files to add dialog: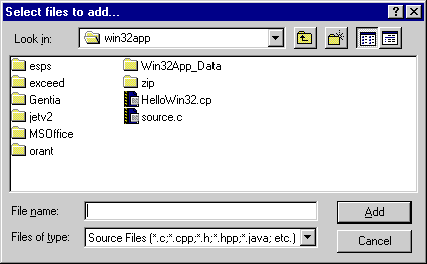
Add files dialog: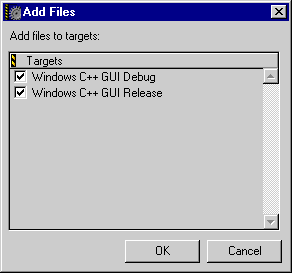
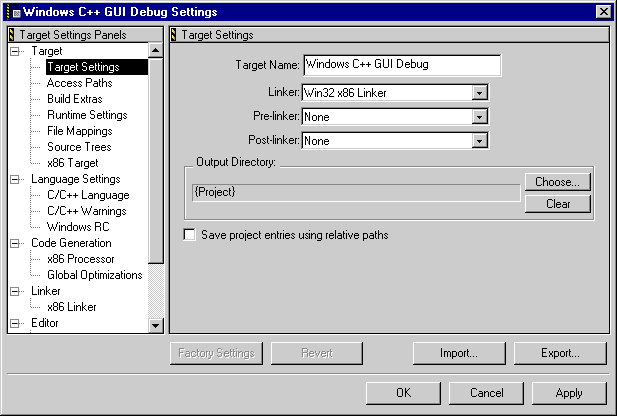
Choose Edit > Target Settings, where Target is the name of the currently selected target for the project. Select Target Settings from the Target Settings Panels area. The Target Settings panel appears, as shown in Figure 14.4. Select Batch File Runner from the Post-linker list-box, then click OK to save the new settings and close the window.
Your project is now ready to use batch files.
 NOTE
NOTE When you are working with more than one batch file in a project, you can select which batch file will be invoked by the batch file post-linker by listing it first in the Link Order view. All other batch files will be ignored. For information on the Link Order view, refer to the IDE's Online Help.