
 NOTE
NOTE
Empty Project option, see "Linker" and "File Mappings". These sections describe how to configure the IDE so that you can add files to your project.
Normally, the IDE forces each file in a project to have a unique name. To remove this restriction, enable the Save project entries using relative paths checkbox in the Target Settings panel.
See "Access Paths" for more information about defining additional paths in your project.
For more information about the Message window, see "Guided Tour of the Message Window."
The IDE always places added files and groups after the currently selected item in the Project window. If the Project window does not contain a selection, the added items appear at the bottom of the window. To place a new file or group in a particular location, always select the file or group above the desired location before using the Add Files or Add Window command.
Regardless of the expanded or collapsed state of a selected group, the IDE places the added files at the end of that group. To learn about how to select a file or group of files, see "Selecting Files and Groups."
You can move a file or group to a new location within the project. For more information, see "Moving Files and Groups".
Choose Project > Add Files to open the Add Files dialog box, which helps you add files to your project. Use the menu command to add source-code files, libraries, resource files, and other files.
In order for files to appear in the dialog box, their extensions must match a mapping defined in the File Mappings preference panel. To examine and configure file mappings, see "File Mappings".
Figure 3.13 shows the Add Files dialog box. The Files of Type pop-up menu is initially set to view All Files.
Use the dialog box to navigate through folders and drives to find files that you wish to add.
To select multiple files, as shown in Figure 3.13, press the Control key while clicking the file names in the dialog box.
Adding Files to a Project (Windows):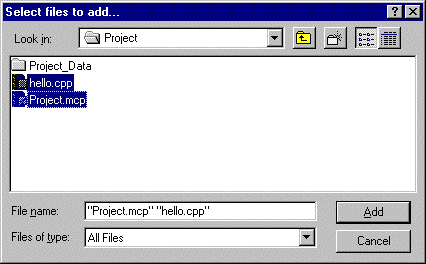
After you select the files that you wish to add, click Add. If your project contains multiple build targets, the IDE prompts you (Figure 3.16) to select the build targets to which you want the files added. There might be a delay while the IDE locates the selected files and adds them to your project.
Click Cancel to close the dialog box without adding any files to the project.
Figure 3.14 shows the Add Files dialog box.
Adding Files to a Project (Mac OS):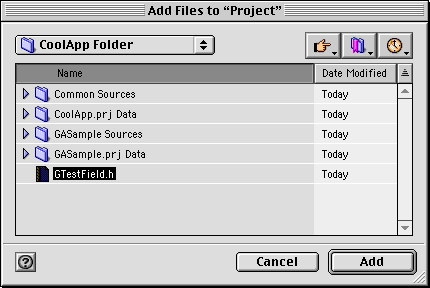
After you select the files that you wish to add, click Add. If your project contains multiple build targets, the IDE prompts you (Figure 3.16) to select the build targets to which you want the files added. There might be a delay while the IDE locates the selected files and adds them to your project.
Click Cancel to close the dialog box without adding any files to the project.
Figure 3.15 shows the Add Files dialog box. The file path field at the top of the dialog box displays the path to the current directory listing.
Click Remove All to clear the Select files to add list.
Adding Files to a Project (Solaris and Linux):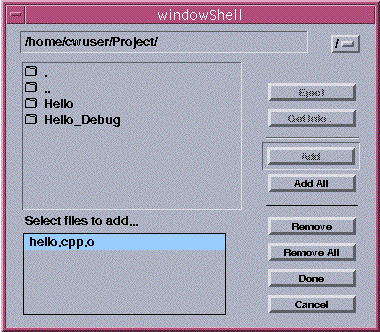
After you select all the files that you wish to add, click Done. The IDE adds to your project the files in the Select files to add list. If your project contains multiple build targets, the IDE prompts you (Figure 3.16) to select the build targets to which you want the files added. There might be a delay while the IDE locates the selected files and adds them to your project.
Click Cancel to close the dialog box without adding any files to the project.
You can drag and drop files or folders into an open Project window to add them to the project.
To complete the add operation, drag your selection into the Project window. If your project contains multiple build targets, the IDE prompts you (Figure 3.16) to select the build targets to which you want the files added.
NOTE
Releasing the mouse button (dropping the files) adds the dragged items to the project, inserting them below the position indicated by the focus bar. If your project contains multiple build targets, the IDE prompts you (Figure 3.16) to select the build targets to which you want the files added.
Although the IDE supports dragging and dropping files into the Project window on all platforms, some platforms do not allow you to remove files by dragging them out of the Project window. To learn how to remove files from the Project window, see "Removing Files and Groups".
Adding Files to Specific Build Targets: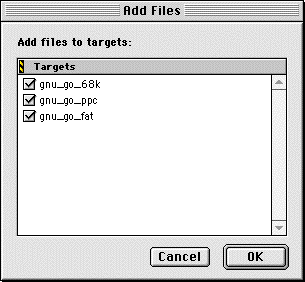
The Add Window menu command adds to the active project the file associated with the active editor window. You typically use this command when you create a new file and decide to add that file to the active project.
The IDE enables the Add Window menu command only after you meet the following criteria:
1. Ensure that a project is currently open.
The IDE adds the file to the active project.
2. Open the file that you wish to add to the project.
An editor window appears and shows the contents of the file.
3. Choose Project > Add Window.
The name of the menu command changes, based on the file name shown in the title bar of the active editor window. For example, if the name of the active window is MyFile, the name of the menu command changes from Add Window to Add MyFile to Project.
If the file that you wish to add is currently untitled, the Save As dialog box appears. Use the dialog box to name and save the file. The IDE adds the saved file to the active project.
If your project contains multiple build targets, the IDE prompts you (Figure 3.16) to select the build targets to which you want the file added.