
To create a catalog, click the New Catalog button in the toolbar of the Component Catalog window. Alternatively, choose New from the File menu, click the File tab at the top of the New window, and then select Component Catalog File in the File view. You see the window shown in Figure 13.13.
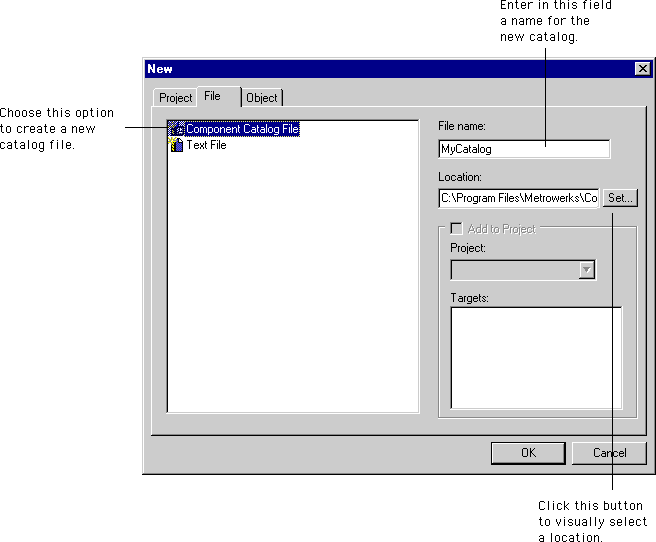
Type a name for your new catalog file in the File name field.
 TIP
TIP
.ctlg file name extension, like this: MyCatalog.ctlg. This naming convention helps you quickly identify the catalog file on your hard disk. In addition, the Windows-hosted version of the CodeWarrior IDE uses this extension to identify the catalog file.
When you finish typing a name for the catalog and choosing a location in which to save that catalog, click OK in the New window. The IDE displays the Component Catalog window and adds the new catalog to the Catalog Pane, as shown in Figure 13.14.
A new catalog added to the Catalog pane: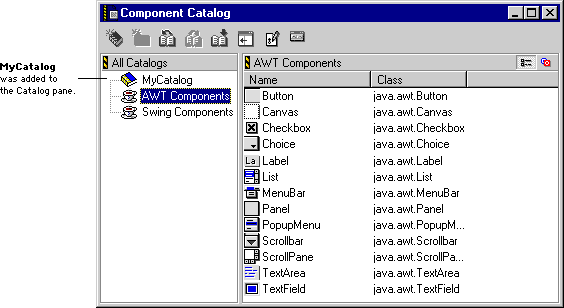
To add a component to your new catalog, follow these steps:
1. Select an existing catalog with the component you wish to add.
2. Select the component you wish to add from the Component pane.
In the example, you would select the Button component.
3. Drag and release the selected component onto your catalog.
In the example, you would drag the Button component onto MyCatalog in the Catalog pane, as shown in Figure 13.15. After you release the Button component, it is added to MyCatalog.
Adding a component to your catalog: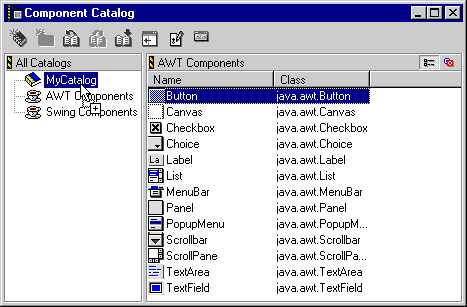 TIP
TIP
You can also add components to your catalog using the Cut, Copy, and Paste commands in the Edit menu and the Layout editor contextual menu. To use these commands, perform the following steps:
1. Select an existing catalog with the component you wish to add.
2. Select the component you wish to add from the Component pane.
3. Choose the Cut or Copy command.
4. Select the catalog to which you want to add the component.