
A toolbar contains a series of elements, represented by icons, which act as buttons. Each element typically represents a menu command. After you click the element, the IDE executes the associated menu command. The toolbar can also contain elements that execute actions other than menu commands. Figure 8.37 (Windows) and Figure 8.38 (Mac OS, Solaris, and Linux) show the toolbar in the Project window.
Project Window Toolbar (Windows):

 TIP
TIP
This section discusses the following topics:
There are two types of toolbars in the IDE:
Your changes to one of these toolbar types apply to every instance of that toolbar type subsequently created. For example, if you modify the toolbar in an editor window, your changes appear in all editor windows opened thereafter. For more information, see "Modifying a toolbar."
Each of the toolbars has a default configuration of elements that you can restore at any time. For more information, see "Restoring a toolbar to default settings."
After you choose a menu command related to a window toolbar, the command affects the toolbar in the active window. For more information, see "Toolbar Submenu."
A toolbar can contain the following types of elements.:
Use the commands in the Toolbar Submenu to show or hide a toolbar. Hiding a toolbar does not change the toolbar's configuration of elements.
This section discusses the following toolbar types:
To display the main toolbar, choose View > Toolbars > Show Main Toolbar. To hide the main toolbar, choose View > Toolbars > Hide Main Toolbar. See "Restoring a toolbar to default settings" for more information.
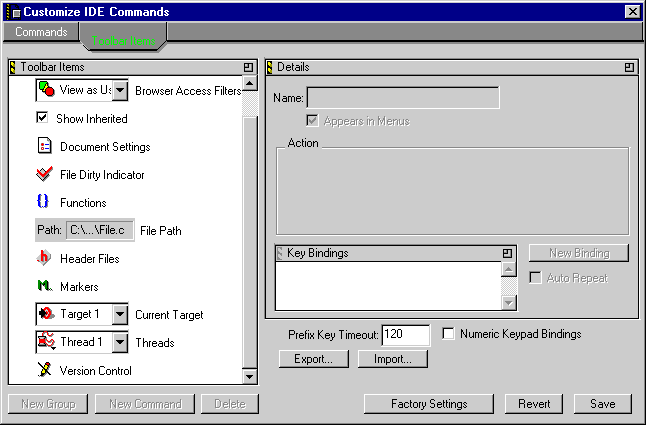
To display the floating toolbar, choose Window > Toolbar > Show Floating Toolbar. To hide the floating toolbar, choose Window > Toolbar > Hide Floating Toolbar. See "Restoring a toolbar to default settings" and "Anchoring the floating toolbar (Mac OS, Solaris, and Linux)" for more information.
 NOTE
NOTE
To hide an active window's toolbar, choose Hide Window Toolbar from the Toolbar Submenu. The other components of the window shift to fill the space previously occupied by the window's toolbar. All subsequently opened windows of that type will have hidden toolbars.
To display an active window's hidden toolbar, choose Show Window Toolbar from the Toolbar Submenu. The other components of the window shift to allow room for the window's toolbar. All subsequently opened windows of that type will display toolbars.
After you hide the editor window toolbar, the default toolbar elements appear in smaller form along the bottom of the editor window, as shown in Figure 8.40. When you show the toolbar again, the tools reappear along the top of the editor window, as shown in Figure 5.1.
Editor Window With Hidden Toolbar: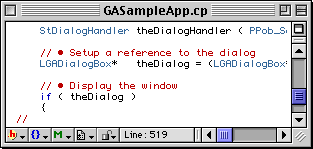
You can also show or hide the editor window toolbar with the Toolbar Disclosure button. For more information, refer to "Seeing Window Controls."
You can modify a toolbar in the following ways:
In certain circumstances, there are restrictions on which elements you can add or remove from a toolbar. See "Adding a toolbar element" and "Removing a toolbar element (Windows)" for more information.To add an element to a toolbar, follow these steps:
1. From the Toolbar Items list, select the element that you want to add to a toolbar.
Ensure that the destination toolbar is visible.
2. Drag the element's icon from the Toolbar Items list to the destination toolbar.
3. Release the element at the desired position.
After release, the IDE inserts the element in the destination toolbar.
The toolbar might not accept an element for the following reasons:
You can clear all elements from a toolbar and build your own toolbar from scratch. Table 8.2 shows how to clear the floating toolbar and window toolbars.
Clearing Toolbars:|
To clear the
|
Windows
|
Mac OS, Solaris, and Linux
|
|---|---|---|
TIP
Clear Toolbar from the contextual menu that appears.
In some cases, the IDE might not remove certain elements after you choose the Clear Window Toolbar command. The elements that the IDE does not remove are critical to the toolbar's basic purpose.
NOTE
You can reset a toolbar to its original (default) factory settings. Table 8.3 shows how to reset the floating toolbar and window toolbars.
TIP
Restore Toolbar from the contextual menu that appears.
NOTE
|
To reset the
|
Windows
|
Mac OS, Solaris, and Linux
|
|---|---|---|
To anchor the floating toolbar when it is currently free-floating, choose Window > Toolbar > Anchor Floating Toolbar.
To release the floating toolbar when it is currently anchored, choose Window > Toolbar > Unanchor Floating Toolbar.