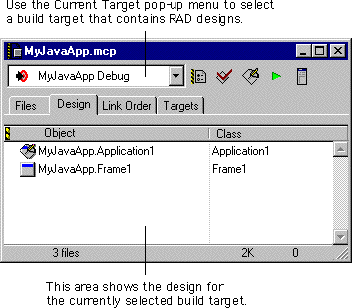
To add a design to an open project in the IDE, choose New from the File menu. The IDE displays the New window, shown in Figure 12.13. Click the Project tab at the top of the window to display a list of available wizards.
The wizards you use to create designs are the same wizards you use to create projects:
To add the new design to the project, enable the Add Design to Project checkbox. Because you are adding the design to an existing project rather than creating a new project, the Location field grays out, as shown in Figure 12.13. Type a name for the new design in the Design Name field.
Select the project's name from the Project pop-up menu, as shown in Figure 12.13. The design is added to the project you choose from this pop-up menu.
Adding a design to a project: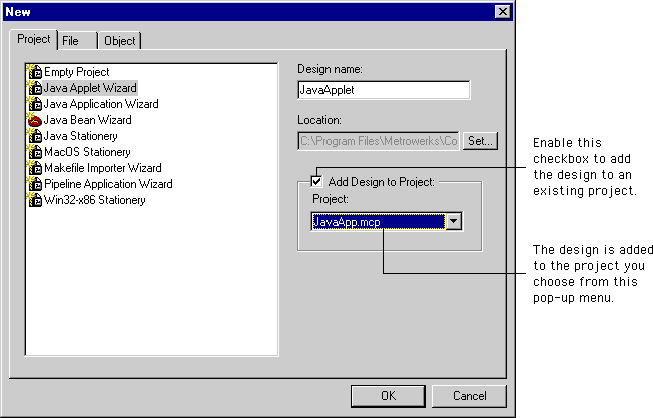
After you click OK, the selected wizard opens and guides you through the design-creation process. See "RAD Wizards" for more information about each wizard. When you complete the wizard, the IDE adds the design to the project.
Each RAD project can have multiple designs. However, a single project file can have at most 255 build targets. Because each design can have several build targets, you should keep this limit in mind as you add designs to your project. Many of the suggestions in "Strategy for Creating Complex Projects" apply when creating multiple designs for a single RAD project.
Design view in Project window: