[ First ] [ Previous ] [ Next ] [ Last ] [ Manuals ]
Creating RAD Projects

To create a CodeWarrior RAD project, choose New from the File menu. The IDE displays the New window, as shown in Figure 12.1.
Click the Project tab at the top of the window to display the Project panel. This panel shows the available stationery and wizards that you can use to create new CodeWarrior projects. When you select an item in the list, various options become available along the right side of the Project panel.
New dialog box: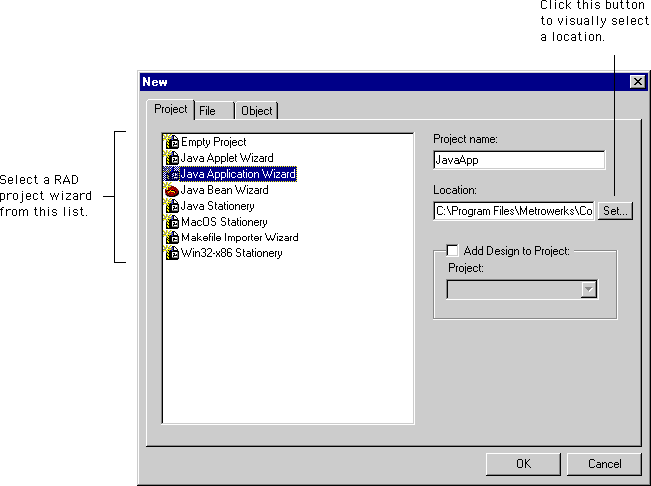
To create a new RAD project, select one of the following wizards in the project list:
-
Java Applet Wizard-helps you create a Java applet. The wizard asks for information about the applet's class, HTML page, parameters, and description.
-
Java Application Wizard-helps you create a Java application. The wizard asks for information about the application's class, frame class, and description.
-
Java Bean Wizard-helps you create a Java bean. The wizard asks you for information about the bean's class, location, package, and modifiers.
After you select a project wizard, type a name for your new project in the Project name field.
Save dialog box (Windows):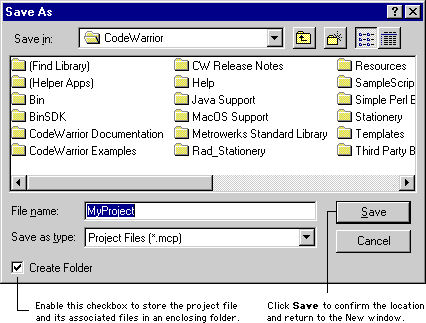
 TIP
TIP
We suggest naming your project file with a .mcp file name extension, like this: MyProject.mcp. This naming convention helps you quickly identify the project file on your hard disk. In addition, the Windows-hosted version of the CodeWarrior IDE uses this extension to identify the project file.
The Location field displays the full path to the folder in which the project is saved. To change the current path, type a new path directly into the field. Alternatively, click the Set button to the right of the field to display a dialog box, which is shown in Figure 12.2 (Windows) and Figure 12.3 (Mac OS). Use the dialog box controls to navigate to a location on your hard disk where you want to save the project. To create a new folder to contain the project file and all of its associated files, make sure the Create Folder checkbox is enabled. Then click Save to confirm the location and return to the New window.
 WARNING!
If you try to save the new project, and you already have an existing project with the same name in the same location on the hard disk, the IDE displays an error message. Be sure to use a unique name for your new project.
Save dialog box (Mac OS):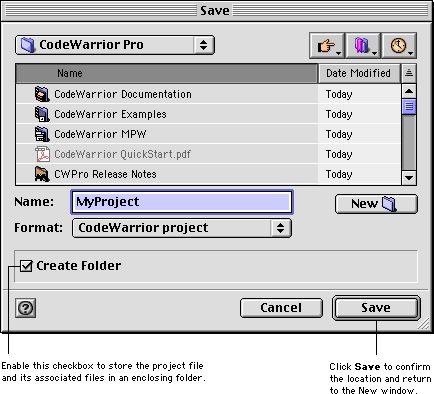
When you finish typing a name for the RAD project and choosing a location in which to save that project, click OK in the New window. The IDE opens the wizard you selected in the Project panel. The selected wizard guides you through the remaining steps of the project-creation process. For detailed information about each wizard, see "RAD Wizards".
[ First ] [ Previous ] [ Next ] [ Last ] [ Manuals ]
Visit the Metrowerks website at: http://www.metrowerks.com
For assistance contact Metrowerks Technical Support at: cw_support@metrowerks.com
Copyright © 2000, Metrowerks Corp. All rights reserved.
Last updated: August 17, 2000